Review

Business by Day, Party by Night - Samyang 12mm f2 lens review by Jan

Disclaimer: All photos were taken pre-pandemic

Samyang 12mm f2.0 Review

Samyang_12mm_f2_review_cover

The Rokinon/Samyang 12mm f2 (which I will plainly name the Samyang 12mm f2 from hereon), was my first Samyang lens I bought. In my ownership it has an extremely contrasting job description because of its ultra wide angle focal length.

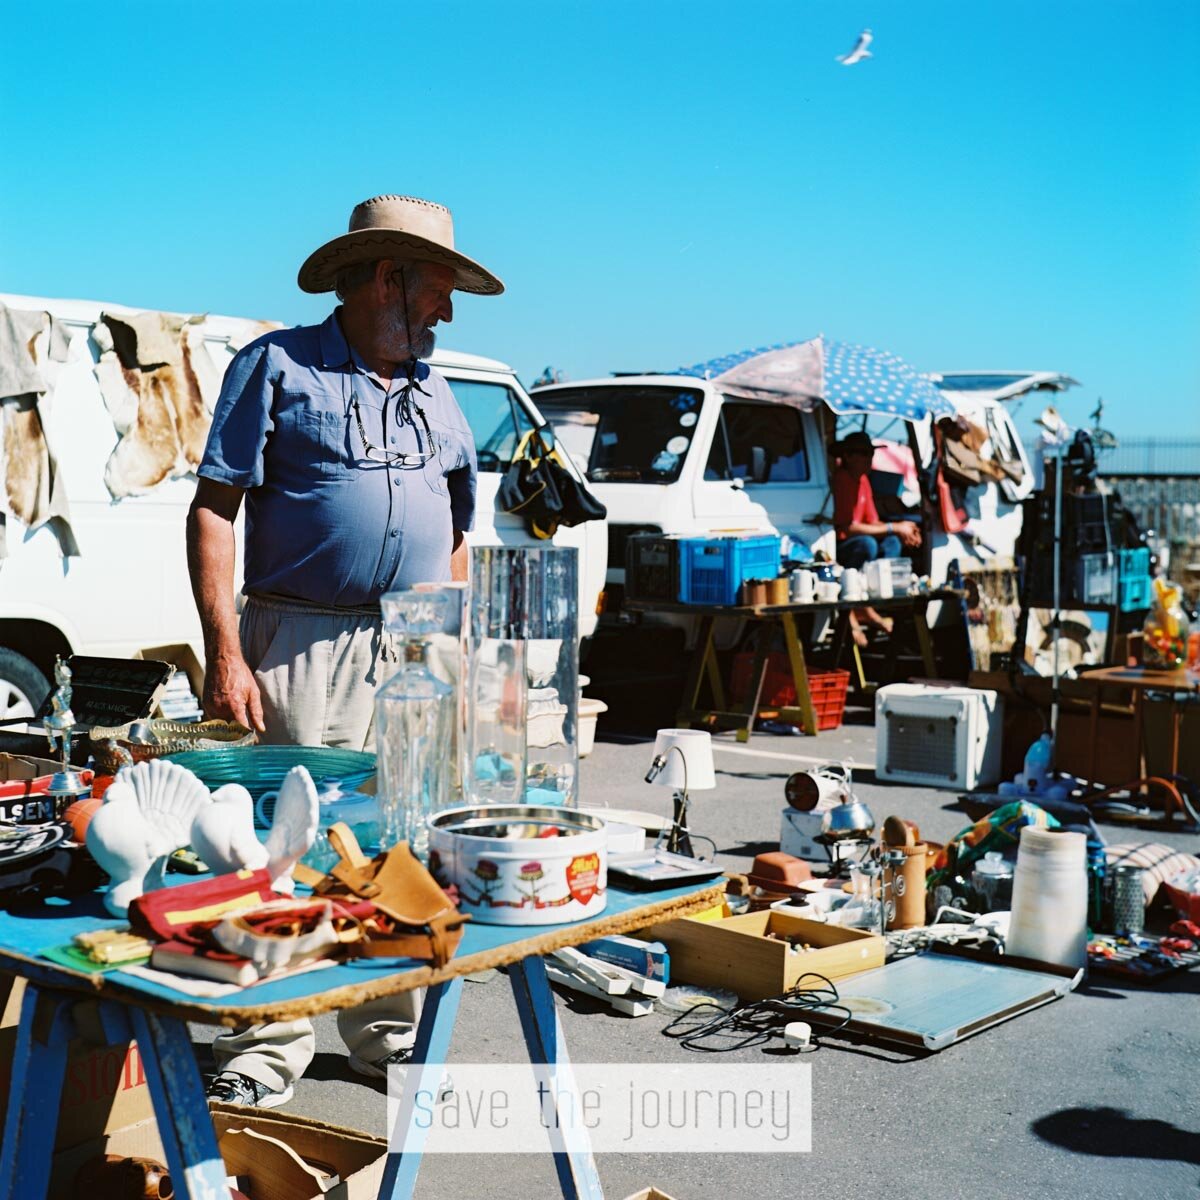
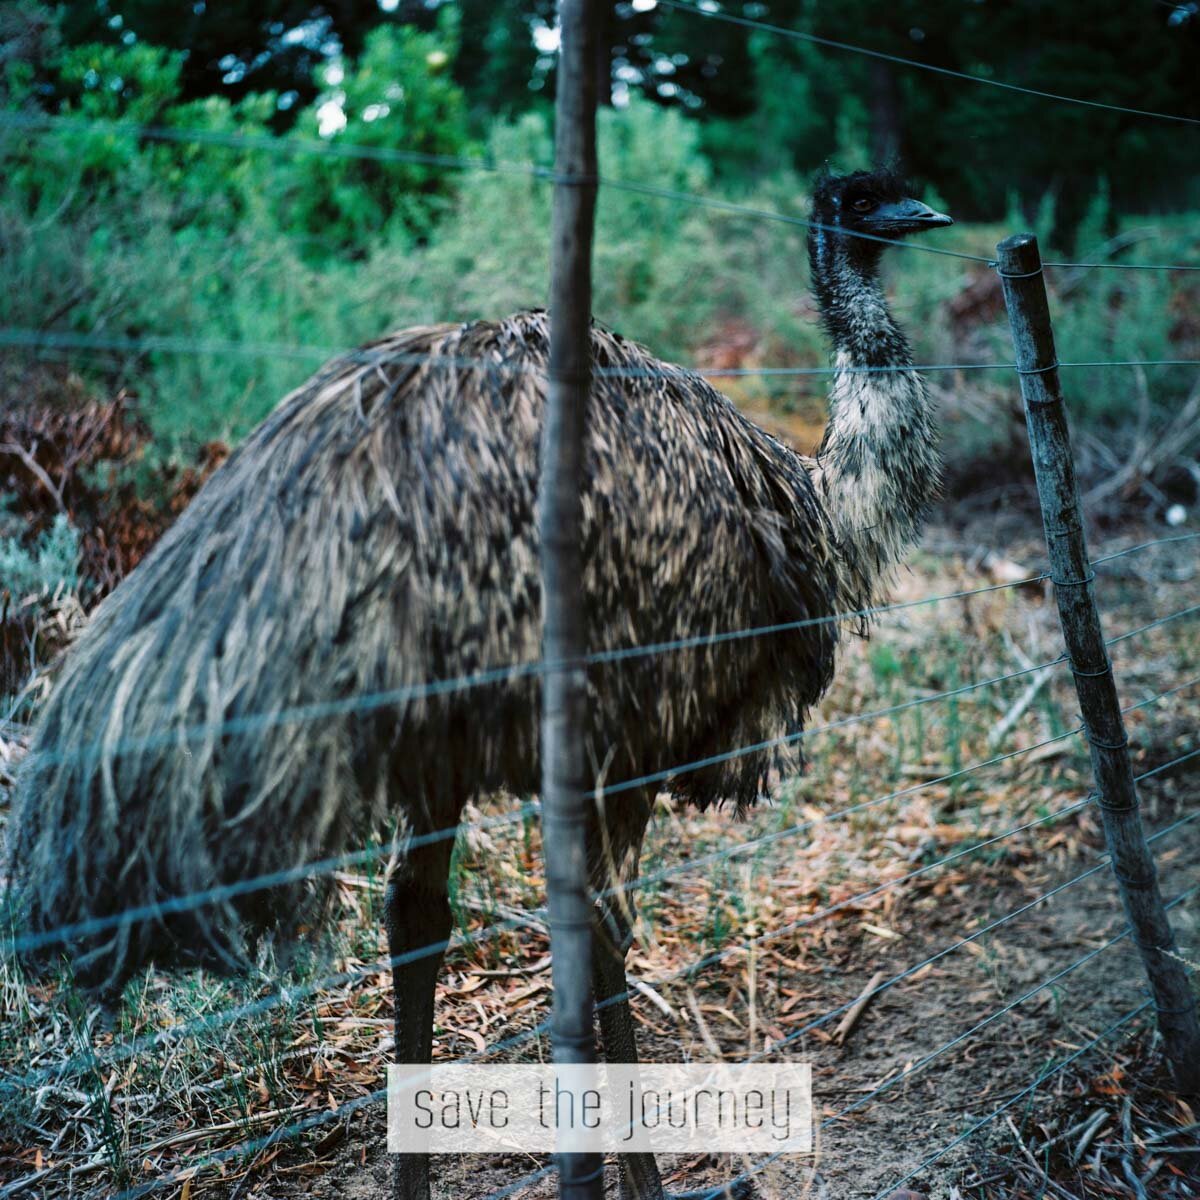
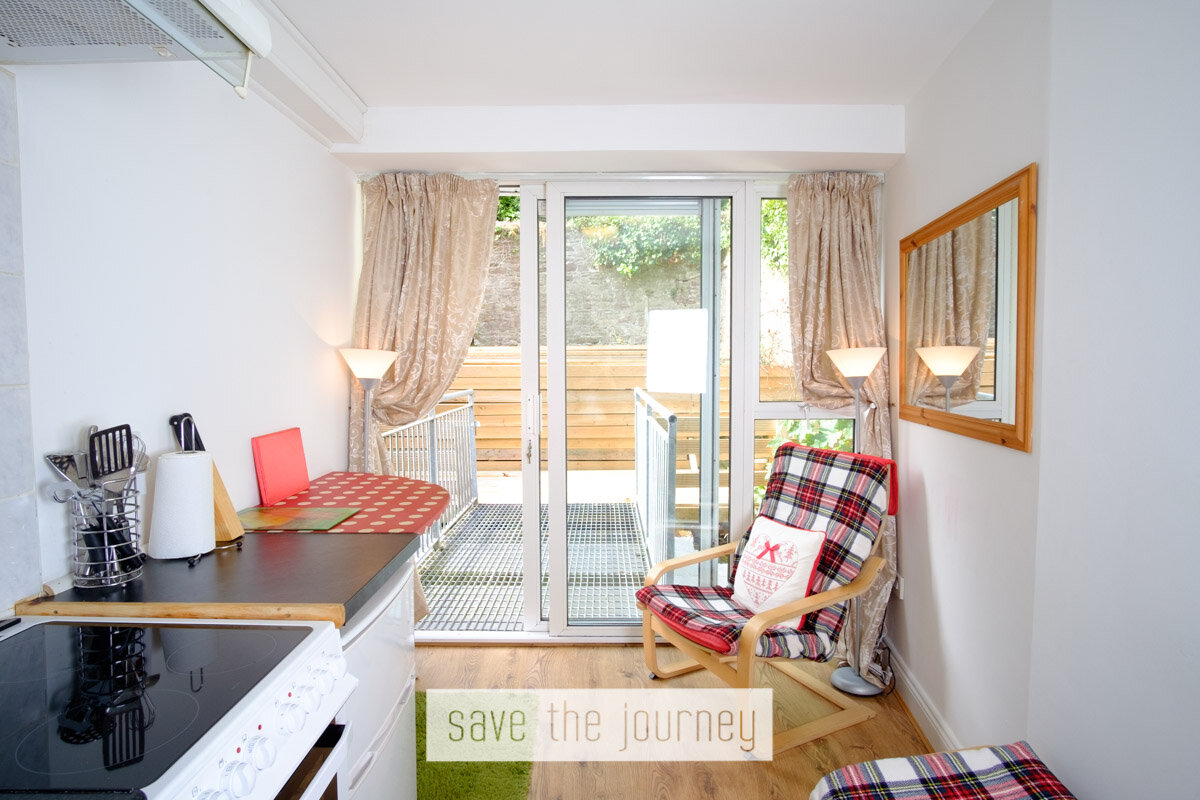
Initially I bought this lens as I needed something wider for my real estate photography here in Cork city. Using an 18mm lens was just not wide enough to capture all rooms in an apartment or house. The broom cupboards and bathrooms always proved troublesome. Especially here in Ireland where houses always seem to be smaller, rather than larger. Here are some real estate sample photos of the Samyang 12mm f2 in action, but importantly, this is probably the least interesting part of this lens review. Hence why I am rushing this part, because I figured out a really cool way on how to use this Samyang lens, and exploit it’s ultra wide focal length to the utmost. I’m sure this will interest you more than real estate photography in Cork city.

Business over, this is the ultimate party lens! And it’s all down to the characteristics of an ultra wide angle lens. And this Samyang 12mm f2 absolutely nails them.
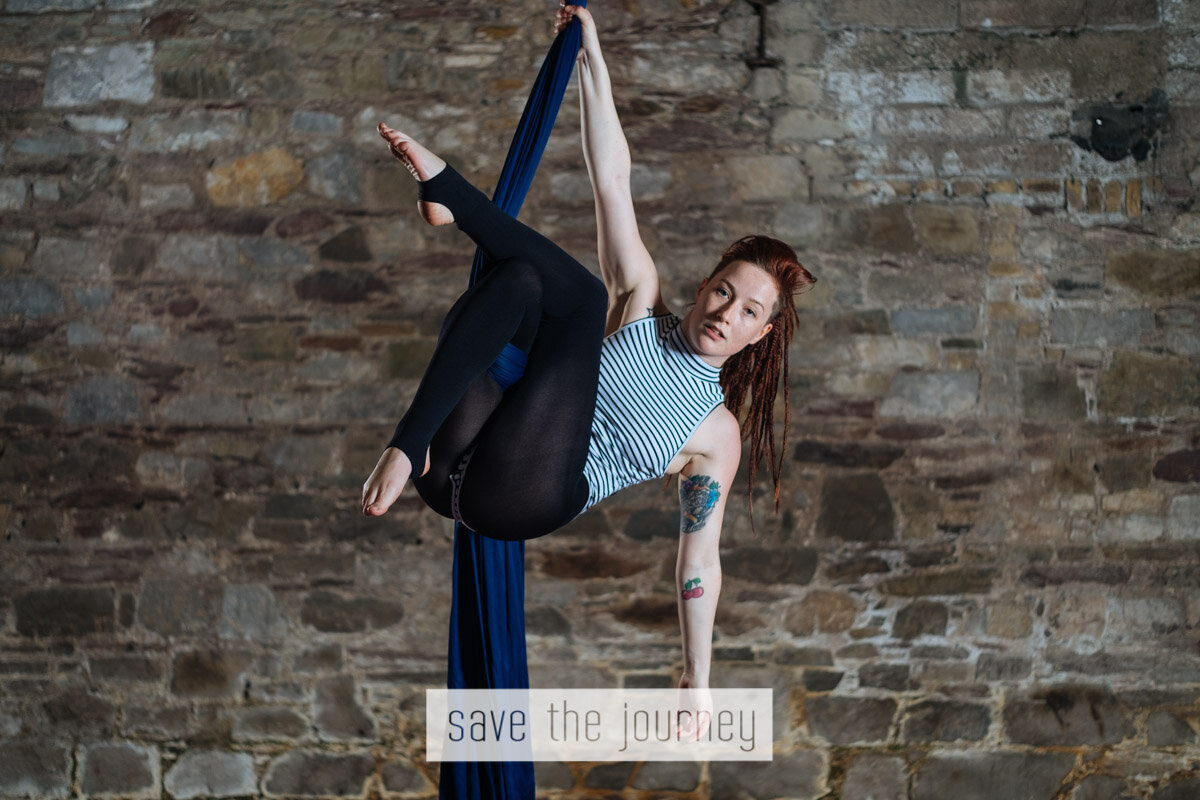
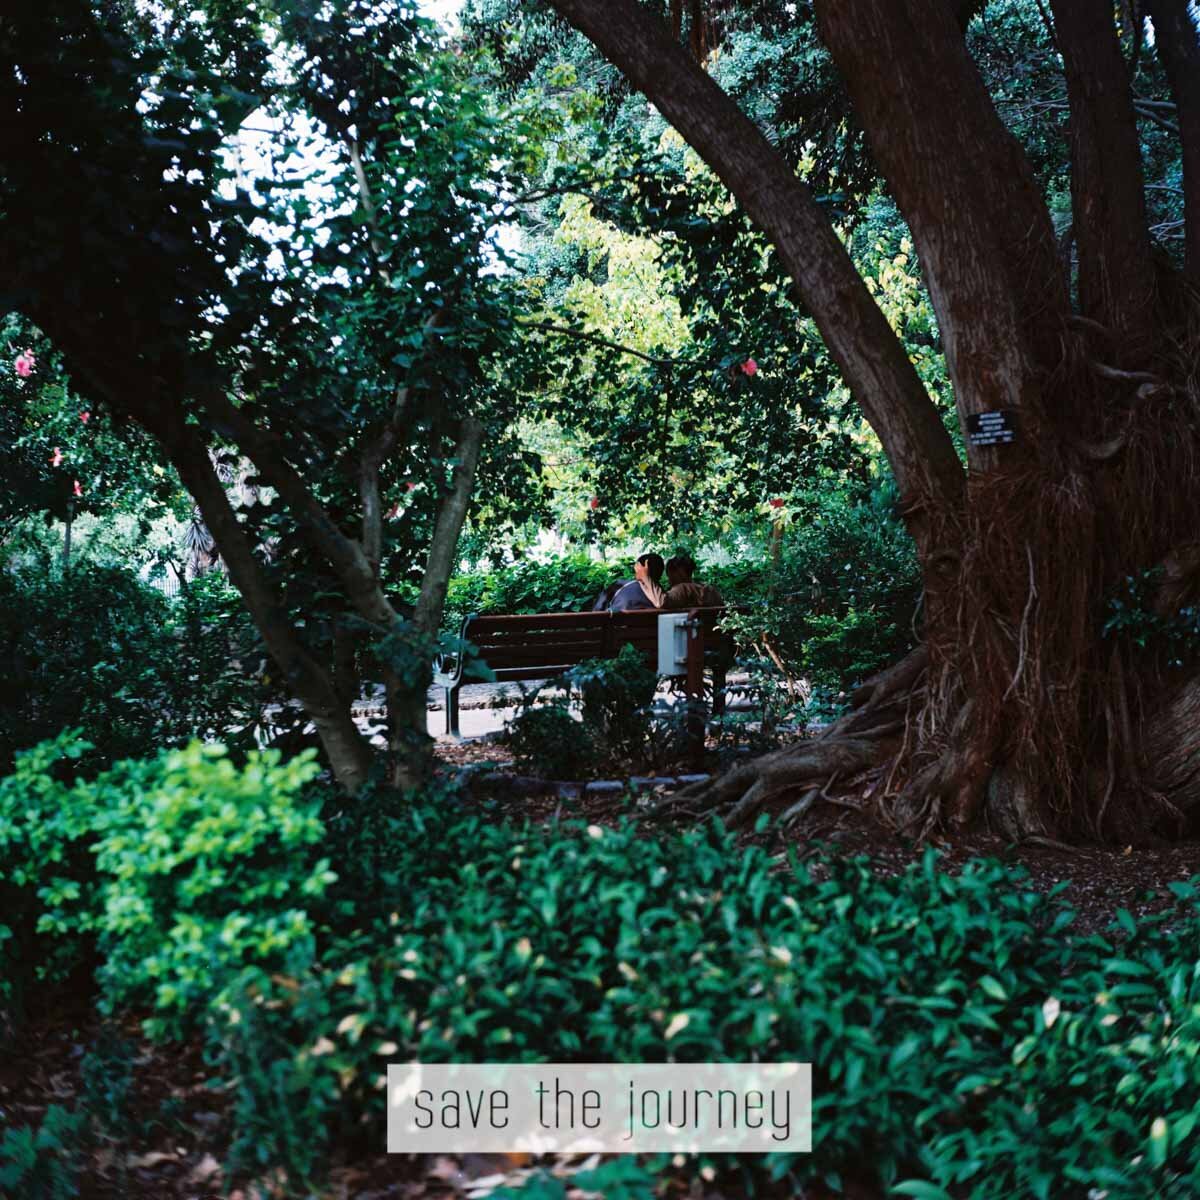
Hey, that’s me!

So what are the characteristics of an ultra wide angle lens?

The most obvious answer is that it’s primary function is that it has an ultra wide focal length. That means, you basically have to just vaguely point at the subject in question and take the photo. Looking at the screen or through the viewfinder becomes an afterthought and yet, I can almost guarantee you that your subject will be in frame.

The secondary characteristic is that it has a much wider depth of field than, say, a Fujifilm 35mm f1.4 lens, or the bokehlicious Fujifilm 56mm f1.2 lens. This means focusing is not very difficult, even more so when stopped down, where it isn’t even a necessity.

Let’s put those two characteristics together and boom - we have a perfect party photography combo! Add a flash on the camera, stop down the lens to f5.6-8, focus to about 0.5m, set the manual exposure and importantly, zoom the flash to 28-35mm (full frame equivalent) focal length to get some delicious, natural vignetting.

I personally love this look.

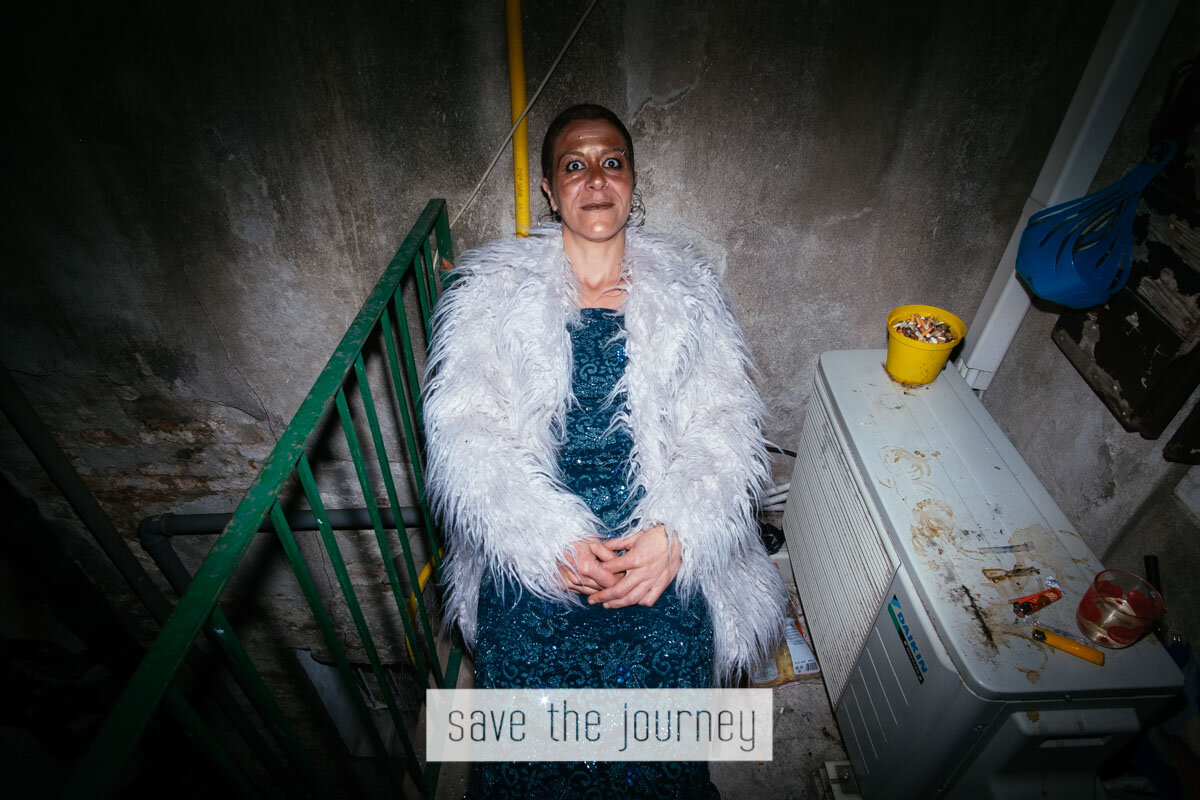
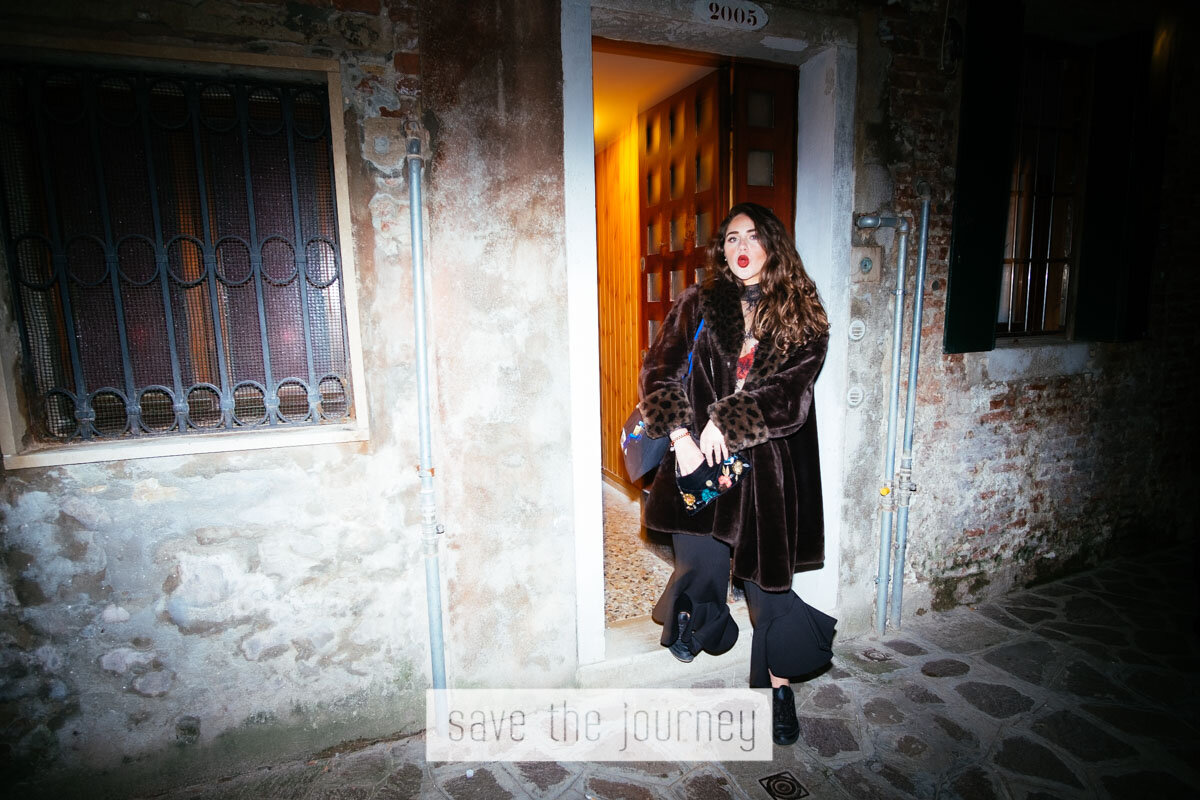
With this set up, the camera works instantly and becomes a speed demon. After all, there is no auto focus, or any other automatic process slowing it down. This is especially noticeable on older Fujifilm cameras, like the X-E1 or X-Pro1. This is a handy side effect if you don’t want to take your newest and best Fujifilm camera to a party, especially after a couple of drinks.

I use the Yongnuo 560 IV flashes, which don’t cost a lot either, and this Samyang 12mm f2 lens is very affordable too. So feel free to pass this camera around to friends as the party continues. Just blindly aim, you don’t even need to hold still, use the flash and slow shutter speeds to get some nice light streaks running through your photo. Every shot will look cool!

I think this lens was intended for astrophotography, so Samyang made the focus ring quite stiff to prevent accidental shifts caused by bumps or nudges of the focus ring. Even better for this situation! It’s another positive.


This is the smallest lens I own. Always good to have in my pocket.

This is the smallest lens I own. Always good to have in my pocket.

This is why it’s such a contrasting lens for me. On one end I use it for professional work, and on the other it’s my ultimate Friday night lens.

I think this lens is common enough with numerous existing reviews that I do not need to cover the basics, like the slightly stronger distortion (which I actually like for my personal photography but is a little annoying for my real estate photography, yet fixable in Lightroom), vignetting, CA, sharpness etc.

Maybe one thing that I would like to mention is that it does seem to have warmer colours than all of my other lenses. I often find myself editing the white balance in Lightroom to be cooler in comparison, to get the same results in colour. It’s not an issue really, just a slight annoyance sometimes.

Make sure to have your UV filter and lens hood on at night! It might not be an expensive lens, but there’s no need to be reckless either!

Make sure to have your UV filter and lens hood on at night! It might not be an expensive lens, but there’s no need to be reckless either!

Otherwise I’m delighted with the quality (both build and image quality), price and size of it. The colours and contrast also are typically Samyang, and that’s a massive compliment in my eyes. There’s a reason why I also own the Samyang 21mm f1.4 (incidently my favourite lens) and the Samyang 35mm f1.2 (which I personally think is better quality than the Fujifilm 35mm f1.4). Although these lenses have been around for a while, they are part of the newer ranges which are much better than the SLR range they had originally (like the famous 85mm f1.4 which I was very disappointed with).

The two negatives for me are basically all the same ones I mentioned in my other review on the Samyang 21mm f1.4.
I did wish that the Samyang lenses would have an electronic chip that would store the lens name in the metadata. I know you can set it in the camera, but I often forget to change it or don’t have the time to change it. Being able to check the metadata is not vital but would be really helpful sometimes.
With this 12mm lens I also had the issue that infinity focus wasn’t perfect. I managed to open the lens and correct it but I did wish it came correctly calibrated from the factory.
Those really are the only annoyances I have with this lens. But having an f2 lens at this focal length and price and quality is phenomenal, so I’m not too upset. Using this lens at f2 also offers more bokeh than expected. Definitely more so than the Fujifilm equivalent, the 10-24mm that would struggle, being just f4. Yes, Fujifilm makes the more expensive 8-16mm f2.8 that would only be one stop off this lens, but with the price difference you can hardly compare the two lenses.

Samyang_12mm_f2_review_11

I really like wide angle portraits, although I must admit, this one is a bit extreme. But having this one photo in a set of portraits that I shot around the Cork city harbour, might help your model or you yourself, the photographer, stand out.

The next time you’re deciding which lens to use for a certain event or situation, it doesn’t hurt to think a bit laterally on how you can achieve the most “keepers”. In certain environments you are forced to use the most light sensitive lens you own (like the time I was a MMA photographer and was forced to use my Fujifilm 56mm f1.2 as my primary lens, because those arenas are surprisingly dark).

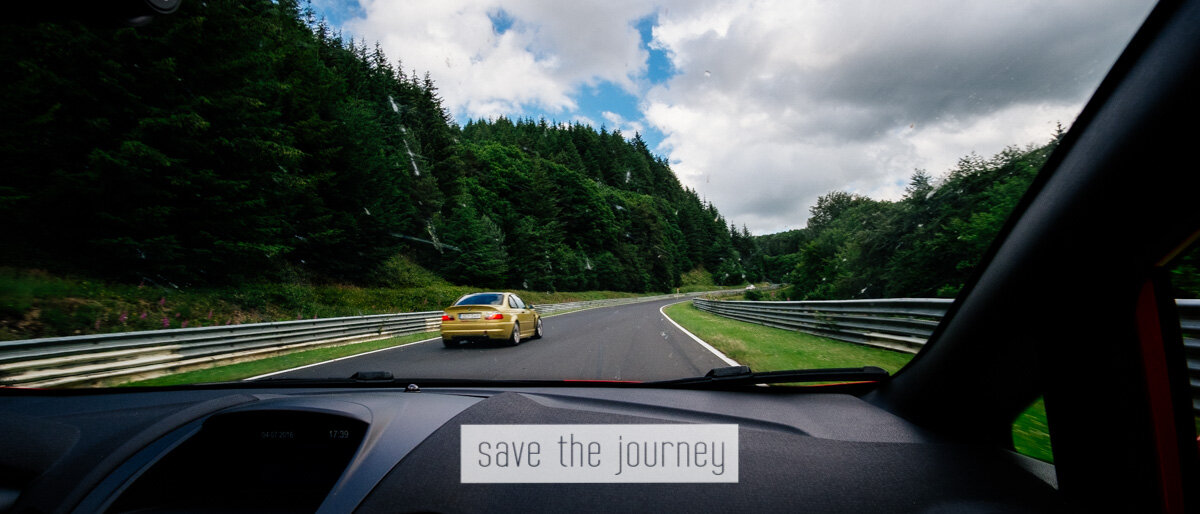
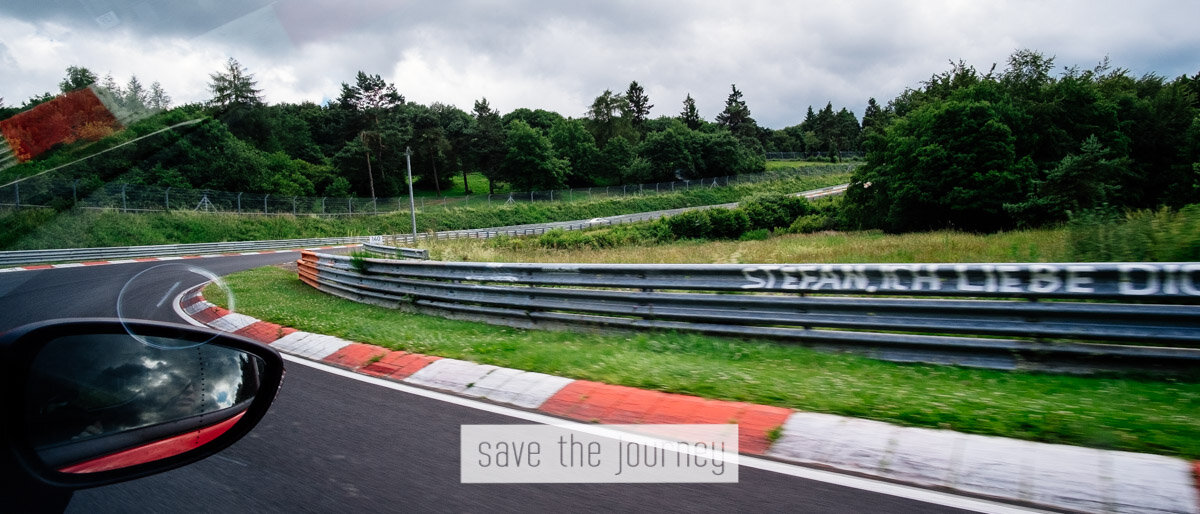
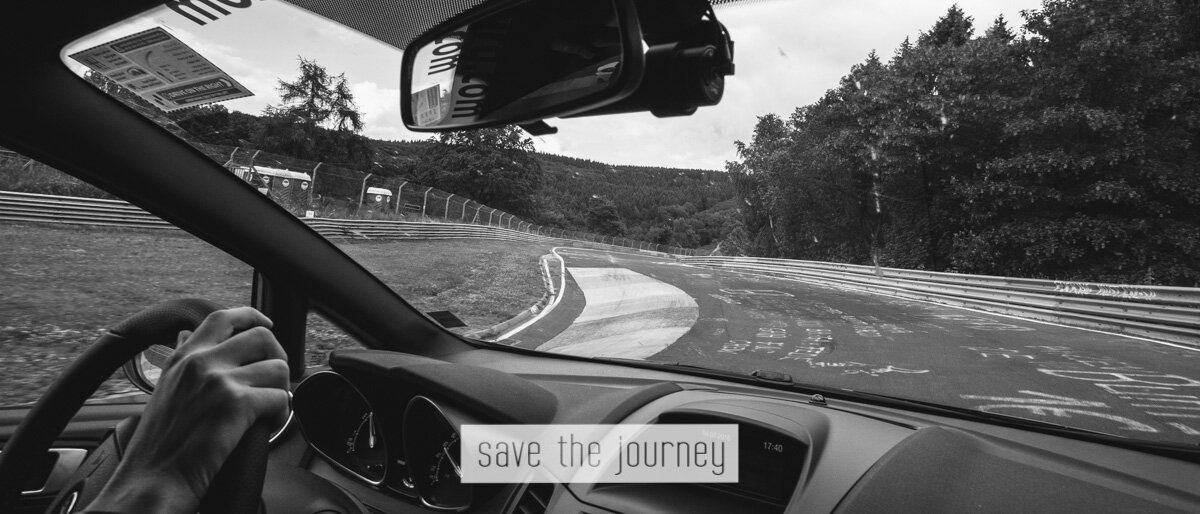
Other times, like when I went to the Nurburgring Nordschleife for a Touristenfahrt, I had my partner take photos with the Samyang 12mm f2 attached, as a quasi high end GoPro. It was a good decision because my partner was concentrating too hard on not vomiting. Focusing or doing anything more than “spraying and praying” would have been impossible.

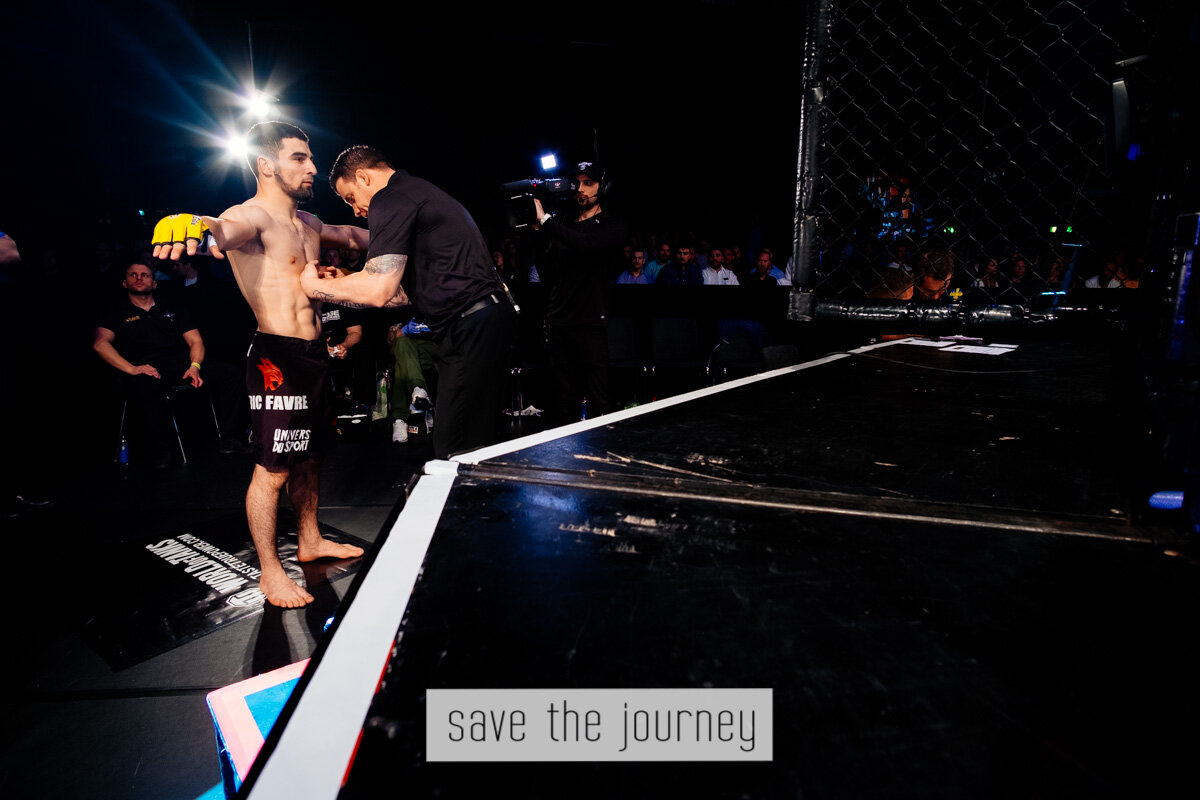
And to end it off, here are some MMA photos as well. These were taken in Sweden at a Cage Warriors event. When all other photographers were always photographing with telephoto lenses, I liked to whip out this alternative lens every now and then to get shots that no one else would have. And honestly, they’re some of my favourite MMA photos of all time.

Conclusion

I would really recommend this lens to most photographers. Not everyone needs such an extreme focal length, but for the price, it really is fun to just have in your camera bag and use it every now and then. Unlike other cheaper, or more affordable, lenses, this one won’t stand out negatively in comparison to your other, higher quality and more expensive lenses either (looking at you Fujifilm 18mm f2 here! - half a joke).

I also recommend checking out other Samyang lenses too. A lot of photographers are put off by the manual focus, which I get, but it’s way easier than a lot of people think. I’m not sponsored by them just by the way. I just really like them and find it odd that they’re often overlooked.

Feel free to check out my Samyang 21mm f1.4 review here or go completely left field and go back to the old medium format years here (what is a TLR??).

Update:

Check out this blog post too of a basketball game I photographed with this Samyang 12mm lens.

From BDSM to a Legitimate Cork Photographer, a Guide on Flashes by Jan

A sorta Yongnuo 560IV and Yongnuo 560-TX review

This is how I dramatically improved my photography in one word; flashes.

For many years I was put off by the complexity of them. It seemed so difficult to get the right exposure, nevermind figuring out how to make your subject look good at the same time! I felt like I had enough on my plate with merely taking a photo in available light.

If I had know that shortly after buying my first proper flash set up I would take the following portrait, I would’ve bought them way sooner!

cork_city_photographer_1

Initially I had bought some Nissin flash, purely to use for my regular job at the time. I was the house photographer for BDSM and Vicarstown in Cork city. I was taking all of their event photos and regularly photographing there every Friday and Saturday night. It was a fun job and I took pride in taking more than just your average club photo. I really got people involved!

I digress – the Nissin flash was purely placed into the hotshoe of the camera and never used in any other capacity.

Cue the Yongnuo flashes. I bought two Yongnuo 560IV flashes and a Yongnuo 560-TX trigger module. This is when my own personal revolution started. No longer bound to the confines of the hotshoe. The flashes were given the freedom to wander wherever I decided to place them. Softboxes soon followed in various sizes. I felt invincible! No longer victim to the available light, or bad weather. Now I could photograph anywhere, at anytime. I would become Cork’s best photographer!

- Breathe -

It all was, and still is, very exciting. I’ve used this setup for over 4 years now and won’t be changing it any time soon.

Yongnuo_YN560_TX

This is the Yongnuo YN560 TX.

The trigger module slides onto the hotshoe of any camera make, analog or digital, medium format or APS-C. Anything. It doesn’t merely trigger the flashes wirelessly, but also controls their intensity and zoom. No running back and forth from camera to flashes. It’s fantastic!

The flashes are fully manual, so no TTL or autoexposure. But using digital cameras has demystified this whole process. Just set the exposure to what you think it might be, take a photo and see the result. Then, adjust accordingly. With some practice, I’ve gotten remarkably accurate results just by using guesswork.
I really enjoy how reliable they are. Once they’ve been synced up to each other, it never has to be done again. They haven’t lost connection once in the time I’ve owned them. As soon as the trigger and flash are switched on, they immediately work with each other. I really appreciate that they are so dependable.

As a rough guideline, here is a basic breakdown of the different looks:

STJX3699-2.jpg

High intensity.

I used the flash at very high intensity, probably full power. You can tell by the high contrast in the face. The background is also quite dark, almost pitch black. This is a method I love to use. If the flash is really bright, the existing light will seem much darker in comparison. Since you’re exposing on the bright subject, the background just disappears into black. Very handy.


STJ13453.jpg

Low intensity.

In this photo I did the exact opposite. The flash is set to a low intensity, just to brighten the face a little and make her hair shine. I am using the ambient light to brighten up the background. This results in a low contrast photo where a lot details remain perfectly visible.


STJ13356.jpg

Creative colours.

I used one large soft box to illuminate the subject and background, and then used the two flashes with colour gels, merely to highlight her hair in different colours.


bfchcbad.jpg

Unorthodox.

The most unusual flash set up and location can be found with this portrait. Taken in an alleyway at night, I placed the flash behind the subject and pointed it straight into the lens, at about a 30° downward angle.


DSCF6876.jpg

Natural.

The previous examples all highlight (pun intended) the use of flashes in a very obvious manner. But how about using it more naturally. Would you have guessed that a flash was used in the following two portrait photos?

STJX3328.jpg

I find it incredible how varied these photos all are, eventhough it’s the exact same flashes and trigger in each photo. It really goes to show how creative one can be with the lighting.
I have a small regret that I didn’t start using them earlier, but having said that, it all happened at the right time. Anything earlier would have been rushing it.
As a last piece of advice, if you have flashes already or are buying some that need AA batteries, the Duracell 2500mAh rechargeables are a game changer! They don’t just allow for a high amount of flash pops and a quick recycling time, but also don’t fade with building internal heat. Do check out Improve Photography’s AA test. They did an excellent job on comparing several brands.

If you enjoyed these flash photos, do have a look at this post where I photographed a boxing club, here in Cork city, using flashes. Or check out Alex, who featured above with his drum, on his shamanic charm. His portrait session was taken at the Lee Fields in Cork. Or check out more reviews here.

And if you would like to book a portrait or family photo shoot in Cork city, contact me here for bookings.

Square, Before It Was Cool - Yashica Mat 124G review by Jan

Yashica Mat 124G Review

YashicaMat124G.JPG

This is a Yashica Mat 124G. This might not look like any other camera you have ever seen before. It kinda looks like some magical box; the top folds open, there’s a crank on the side, why on earth are there two lenses? This camera forces you to completely change your approach to photography. And I don’t think that’s a bad thing.
This Yashica Mat 124G is categorized as a TLR (Twin Lens Reflex System), but before we get too technical, let’s first have a look at what kind of photos, this oddly handsome, camera can capture. Continue on for the review of this unique looking camera.

Loaded with one of my favourite colour films - Kodak Ektar. A fantastic film that has high saturation and high contrast – perfect for the South African sun. When underexposed, it gets a lovely blue tint in the shadows. This is mostly visible in the greens.
This film is, in analog photography terms, a brand spanking new creation. Only released in 2008. But it became an instant classic. The camera was produced somewhere between 1970 and 1986. An incomprehensibly long production cycle compared to nowadays. It’s actually an identical copy of the more expensive, German Rolleiflex. But it doesn’t cheapen the camera or its potential to me.

As you’re looking at the photos, a few things stand out about them. The photos do not look like modern digital photos but still have an incredible image quality that you wouldn’t really expect from such an old camera. How is this possible? Welcome to the beautiful world of medium format film!

35mm-vs-120-film-size.jpg
 

Medium format film (120) is much larger than your standard 35mm film (135) roll. One photo is almost four times as large, measuring 5.6 x 5.6cm.

Another upside of this larger format is that a telephoto lens on this camera becomes a normal lens. The result is loads of swirly bokeh to blur out the background, plus it adds more compression to the square images. These characteristics give the photos a really classy look.
The main downsides is the camera is larger and heavier, and you only get 12 images per roll, instead of 36.

As a sidenote, the photos are square since you can not comfortably tilt the camera 90 degrees and take a portrait photo. As a solution, engineers decided to just let you shoot a square photo, allowing you to crop the photo in either landscape or portrait layout in “post” with minimal loss.

So how do you use it? You’ll need a neckstrap to use this medium format camera. Dangle it really low on stomach level, this will reveal the screen on top. The screen is the reason you have two lenses (hence the Twin Lens Reflex name). The photographer looks through the top lens, the bottom lens takes the actual photo. This is something you need to keep in mind when photographing with the Yashica Mat 124G. What you see is always a little bit different to what you’re photographing. After some practice, you tend to get used to this and the mirrored screen, but with very tight or specific framing, you’re always best to take a couple of photos. Back in the day, seeing what you’re photographing was a bigger issue than it thankfully is now.

Yashica-mat124g-instructions-photographer-cork-2.jpg

The knob at your left hand is the focus, no zoom here.

The knob at your left hand is the focus, no zoom here. And the tiny little button underneath the bottom lens is your shutter button to take the photo. Give the camera a crank with your right hand and you’re set to take your next shot. BUT BEWARE! You only have 11 shots left and your film costs €8 per roll. Developing with digital scans but no prints is about €20. This is the love/hate relationship I have with analog photography!

I do not have this camera anymore, but it’s one I know I will own again at some stage. Especially after writing this review, I have fallen so deeply in love with the Yashica Mat 124G again! These photos are already seven years old, I could hardly believe that 2013 was so long ago! I might just have a look at eBay to cheer me up.

Thanks to Nic Flanagan for providing me with these fantastic sketches.

If you want an analog look on a digital camera, check out this lens combo I have for sale here. The Mitakon Zhongyi Lens Turbo II with an Olympus OM 50mm f1.8 lens. Some great sample photos there too.

Or click here to find out what my favourite lens ever is!